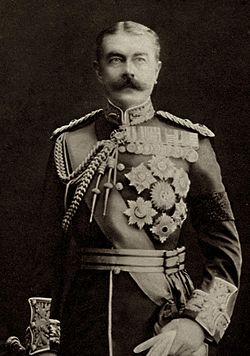
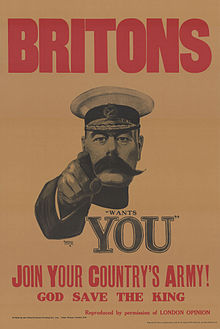
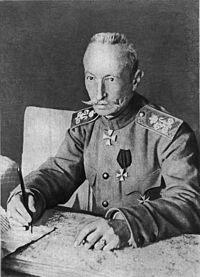
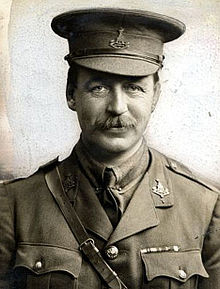
The Battle of Jutland came to an end on 1 June, but the forces deployed for the engagement took one more ship. The U-boats had played no active role in the battle, but they had laid mines, and on 5 June the armored cruiser HMS Hampshire, on its way from Scapa Flow to Archangel, Russia, struck one off the west coast of the Orkney Islands. Because of the extremely rough weather, only twelve crewmen out of 662 crew and passengers survived the sinking of the warship. Among the missing was Field Marshall Herbert Kitchener, the literal icon of the war.
Uncle Herb Wants You!

Herbert Kitchener

HMS Hampshire
Kitchener was in fact in many ways an icon of the High Victorian Age, the victor at Omdurman (Sudan 1898) and the Second Boer War (1899-1902), literally the face of Britain in the Great War and a man (yes, this is very Victorian) whose sexuality was constantly questioned. He was criticized for some of his actions in the Boer War – the Breaker Morant case and the concentration camps – and for ammunition problems at the start of the Great War, but it cannot be denied that he was instrumental in dramatically increasing munitions production and laying the foundation for the immense army sent to the continent.
Less well known (at least outside the knitting community – my world class knitting spouse informed of this) is that he was responsible for the “Kitchener stitch.” During the war he exhorted women to knit sweaters, scarves and socks for the boys, but it turned out the seam across the front of the sock irritated Tommy toes. Kitchener came up with a stitch that eliminated the seam – or at least he took credit for it. Inasmuch as Victorian Field Marshalls did not knit, he must have obtained the idea from a female acquaintance, who remains unknown to history.
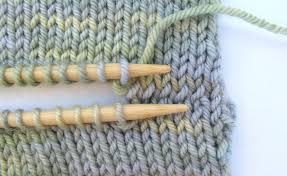
The Kitchener stitch
On the Western Front everyone was killing time waiting for the Big Push on the Somme, but that did not mean that Death took a holiday. On 2 June the Germans, hoping to divert allied resources from the coming offensive, initiated the Battle of Mont Sorrel in the Ypres sector. This was a paltry affair, involving only three divisions on each side, but when it ended on 14 June, there were 8000 British/Canadian casualties and 5765 German – and no gains.
After the battle

Battle of Mont Sorrel
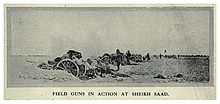
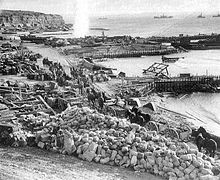
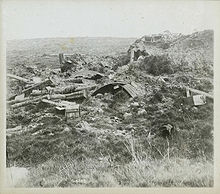
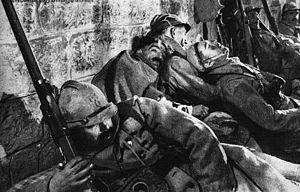
And the Blood Pump at Verdun continued, though at a relative trickle now. On 2 June the Germans launched an offensive east of the Meuse again, beginning with an attack on Fort Vaux. The fort was taken on 7 June, when after a subterranean battle in the galleries the garrison surrendered, having had no water for three days. Taking the position cost the Germans 2740 casualties to 600 for the French, of which 246 were prisoners; the capture of the fort advanced the German line about 70 yards.

The essence of Verdun
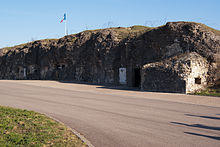
Fort Vaux
Inside Fort Vaux
The main offensive, covering a three mile front, began on 23 June and quickly advanced a mile, capturing Forts Thiaumont and Froidterre but failing before Fort Souville. The Germans reached Chapelle Sainte-Fine, only a bit more than three miles from the Verdun citadel, but were thrown back to Fleury by a counterattack. This halted the advance, and with supply problems and concern about the coming Somme offensive (the initial bombardment began on 24 June) the Germans called off the attack. Chapelle was as close as they would ever get to Verdun. The village of Fleury, incidentally, would change hands fifteen more times by the middle of August.

All that is left of Fleury

Fort Thiaumont

German advance from February to June
In Italy the Trentino offensive ended on 3 June, and Cadorna launched a counterattack eleven days later; it did not achieve enough to earn a name as a distinct battle. Further east, Greece was on the verge of civil war, with the pro-German royalist government in Athens and the pro-Entente Venizelist (remember him?) forces in the north. On 3 June the liberals declared martial law in Macedonia, essentially ending any rule from Athens, and on 6 June the Allies initiated a “pacific blockade” of Greece to put pressure on the government. On 21 June the Allies delivered a note demanding that Greek forces be demobilized and a new government formed; it was accepted and the blockaded was ended the following day.

Pro-Venizelos restaurant in Thessaloniki

King Constantine I and Prime Minister Venizelos in 1913
Meanwhile, to the northeast the Russians, under pressure from the Allies to draw German and Austrian troops away from Verdun and the Italian Front, began their own summer offensive. General Aleksei Brusilov, commander of the Southwestern Front, convinced the Tsar to allow an attack into Galicia, which commenced on 4 June. The “Brusilov Offensive” sent 633,000 Russians against 467,000 Austrians and Germans along a 300 mile front, and employing limited but more accurate artillery fire and the type of shock units the Germans were using at Verdun, Brusilov immediately broke through the Austrian lines.

Alexei Evert
Aleksei Brusilov
Brusilov Offensive
Within a week the Austrians were in headlong retreat, and Brusilov had already bagged 200,000 prisoners. The penetration exposed his northern flank, however, and General Alexei Evert, the commander of the Western Front, just to the north, was opposed to the whole offensive and delayed moving out. As a result, the Germans and Austrians were able to bring up new troops, and when Evert finally attacked on 18 June, he made little headway, partly because he learned nothing from Brusilov’s new tactics. Evert was after all responsible for the disaster at Lake Naroch in March 1915. Nevertheless, by 24 June the Russians had captured Bukovina, the southernmost part of Galicia.
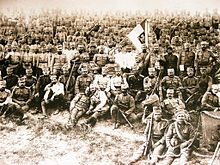
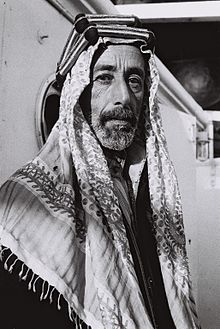
June also saw more Turkish and British activity in western Persia and the merry chase after Lettow-Vorbeck continued in Africa, but the big news in June was the beginning of the Arab Revolt. The British and French had been making big promises to Arab leaders since the war had started, hoping to stir revolts that would tie down Ottoman troops, and in early June (the date is not clear) Sharif Hussein bin Ali, fearing the Turks were about to depose him, signed up with the Allies. As the Sharif and Emir of Mecca, Hussein could field some 50,000 troops, though they were woefully short of modern weapons.

Sharif Hussein bin Ali

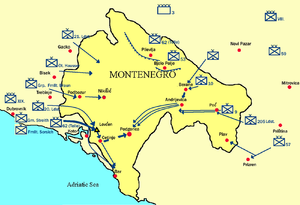
The Hejaz
On 5 June Hussein’s sons Ali (who would succeed his father as King of the Hejaz) and Faisal (who would later be King of Syria then King of Iraq) jumped the gun by attacking Medina but were easily repulsed by the Turkish garrison. Five days later Hussein proclaimed the Hejaz independent and colorfully signaled the beginning of the Revolt by firing a shot from the Hashemite palace. 5000 of his men promptly attacked the Turkish forts in the city and on the third day captured the Ottoman Deputy Governor, who ordered his men to surrender. Better equipped and trained than the Arabs, the 1000 Turkish troops refused, and the fighting continued into the next month. With British naval and air support the port of Jidda was also attacked by Arab forces on 10 June and fell six days later.

Faisal (in 1933)
Ali (in 1924)

Arab soldiers
No, the most romantic figure of the Great War, T.E. Lawrence, was not yet directly involved, but the movement that would dramatically alter the face of the Middle East was underway. Colonel Mark Sykes (of the Sykes-Picot agreement) even designed for the Arabs a flag, which would be the pattern for the national flags of most of the post-war Arab kingdoms.

Flag of the Hejaz
Mark Sykes
![220px-Pobedata_nad_syrbia[1]](https://qqduckus.com/wp-content/uploads/2016/01/220px-pobedata_nad_syrbia1.jpg)