(OK, this is late; it was far more work than I anticipated. I’ll do better at the bicentennial. There is an entire episode on Jutland in the excellent series World War I, which is narrated by Robert Ryan. I also discovered a fine animation of the entire battle: http://www.popularmechanics.com/military/navy-ships/a21101/an-animated-guide-to-the-biggest-naval-battle-of-world-war-i/ My first link! (I think.) But why should I want you to read other peoples’ stuff?)
The Great War was first and foremost a land conflict. But in one way the high seas were of prime importance: commerce. This was especially critical for Great Britain, which utterly depended on overseas trade for food and some resources. Blockading Germany, which the Allies did immediately, would ultimately squeeze the country, but an effective blockade of the British Isles could quickly bring the Brits to their knees. (The blockade and the mining of international waters, which the Allies also did, was contrary to accepted international conventions.)

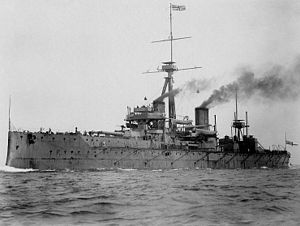
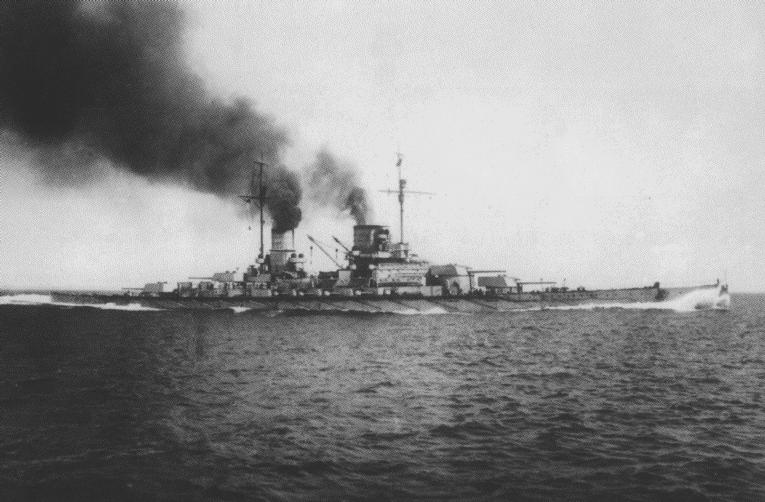
The High Seas Fleet at Wilhelmshaven

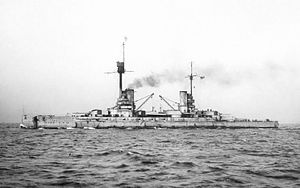
The Grand fleet at Scapa Flow

The High Seas Fleet
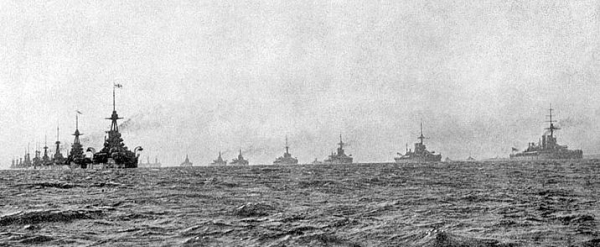
The Grand Fleet
The problem for the Central Powers was that the German High Seas Fleet was far inferior to the Grand Fleet of the Royal Navy, at least in terms of numbers. Stationed at Wilhelmshaven in the Helgoland Bight, where it was protected by extensive mine fields and had access to the Baltic Sea via the Kiel Canal, the German warships could venture into the North Sea only at great risk. It is not clear that the destruction of the High Seas Fleet would decisively tip the scales in the war, but the loss of any serious number of capital ships would certainly be devastating to morale. Besides, those dreadnaughts were so bloody expensive.
Still, the British would be hurt much more by being on the losing side of a major fleet action, though Churchill’s quip that Sir John Jellicoe, the British commander at Jutland, “was the only man on either side who could have lost the war in an afternoon” is certainly exaggerated. Inasmuch as Britain had other naval assets around the globe, the Germans would need to virtually annihilate the Grand Fleet. In the first year of the war the British navy essentially swept the oceans clean of German warships, despite maintaining most of its modern heavy ships in the Grand Fleet in Scotland to cover the North Sea.
The first serious engagement between elements of the two Fleets took place in January 1915, the Battle of Dogger Bank (in the middle of the North Sea). Understanding they could not directly confront the Grand Fleet, the German plan was to conduct fast raids on the English coast, but the British always seemed to know where they were. In fact the British had broken the German naval wireless code, but the Germans believed English and Dutch fishing vessels were observing their ship movements and conveying the information to London.

Vice Admiral David Beatty

Vice Admiral Franz Hipper

Dogger Bank and the Helgoland Bight
Believing the problem was spies, Rear Admiral Franz von Hipper’s scout squadron of three battlecruisers (and attendant smaller vessels) sailed out to clear the area and of course ran into a larger British force of five battlecruisers under Vice Admiral David Beatty. Hipper immediately headed for home and escaped with the loss of the armored cruiser SMS Blücher. The Germans still did not realize their codes had been compromised, but they did learn the lesson the battle had to teach about plunging fire, inadequately armored decks and consequent magazine explosions; the British did not.

SMS Blücher going down

German battlecruisers heading for Dogger Bank
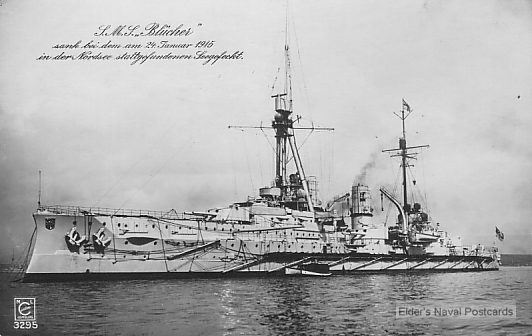
SMS Blücher
A year later the Germans were ready to venture out again. On 18 January 1916 Vice Admiral Reinhard Scheer became commander of the High Seas Fleet and outlined a more aggressive strategy aimed at luring squadrons of the Grand Fleet into more balanced engagements. On 24 April the Kaiser ended unrestricted submarine warfare, and Scheer, who felt that playing by the accepted rules of engagement would produce little, recalled the U-boats to be used against the Grand Fleet.
His first idea was to raid the English coast to draw out British ships, which would could be spotted by Zeppelins and then attacked by lurking U-boats and the High Seas Fleet. Fourteen submarines were sent out and on station off British ports and routes into the North Sea by 22 May, but bad weather and problems with some of the capital ships continued to delay the operation, pushing the U-boats to the absolute limit of their endurance at sea.

Admiral Reinhard Scheer

Admiral of the Fleet John Jellicoe
An alternate plan was implemented: Hipper’s fast squadron of five battlecruisers would head north towards the Skagerrat (the passage between Denmark and Norway) to attack British shipping, followed at a distance by the rest of the fleet under Scheer. The hope was that Beatty’s battlecruisers would be drawn into the path of Scheer’s main force and be annihilated. Hipper sailed on 31 May, followed at about fifty miles by Scheer.
The problem of course is that the British were reading some of the German communications and had a good idea that a major fleet action was afoot, though the details were unknown. Apart from the prospect of the desired lopsided battle against the German fleet, the Admiralty could not risk allowing the High Seas Fleet into the Atlantic. Consequently, on 30 May Admiral of the Fleet John Jellicoe sailed from Scapa Flow and the Moray Firth with the Grand Fleet, while Beatty left the Firth of Forth with his six battlecruisers.

Battle of Jutland
Around 3:30 in the afternoon of the 31st Beatty and Hipper spotted each other and Hipper immediately turned south to draw the British into Scheer’s force. Unaware that the entire German fleet was just to the south and thinking Hipper was fleeing to the safety of the minefields, Beatty followed, the two forces pounding one another with main batteries of 11, 12 and 13.5 inch guns once they were in range at about 15,000 yards.

Hipper’s force consisted of five battlecruisers, five light cruisers and thirty torpedo boats (the German equivalent of the destroyer, which itself was developed to counter the first torpedo boats); Beatty had six battlecruisers, four fast battleships (in a separate squadron under Rear Admiral Hugh Evans-Thomas), fourteen light cruisers, twenty-seven destroyers and a seaplane tender (the first “aircraft carrier” to participate in a naval battle). In the initial encounter Evans-Thomas’ battleships took no part for the first thirty minutes, unable to keep up with Beatty as he steamed south.

Vice Admiral Hugh Evan-Thomas
Despite being outgunned in terms of number and range Hipper immediately began to score hits on the enemy vessels, sinking the battlecruisers HMS Indefatigable at 4:06 and HMS Queen Mary at 4:26. Both blew up with few survivors when their magazines exploded, and minutes after Queen Mary went down a third battlecruiser, HMS Princess Royal, was struck by a salvo and mistakenly reported as also blown up (she was still afloat). Hearing this news, Beatty turned to the commander of his flagship, Captain Ernle Chatfield, and said: “Chatfield, there seems to be something wrong with our bloody ships today.” There in fact was: inadequate deck and turret armor and poor management of the cordite (the propellant for the shells).

HMS Indefatigable sinks after exploding
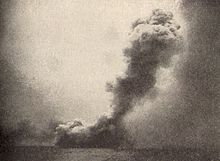
HMS Queen Mary blows up

HMS Queen Mary
At 4:42 Beatty caught sight of Scheer’s fleet and turned north and then west, searching for Jellico in order to spring the trap. Due to a signals mix-up, Evans-Thomas turned five minutes later, and while providing a kind of rearguard for Beatty, his ships were now enduring a rain of shells from the now united High Seas Fleet.
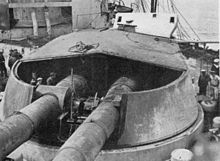
HMS Lion – turret damage

HMS Lion – Beatty’s flagship

At 6:16 Jellicoe finally began forming his battle line, joined now by Evans-Thomas, who took up position on the western end of the line. Steaming north in pursuit of Beatty, Scheer must have been surprised when he saw ahead the entire Grand Fleet in battle formation – or more accurately, saw the muzzle flashes of the battleships that were now sending explosive calling cards in his direction. At 6:34 German shells sank the battlecruiser HMS Invincible, but a minute later Scheer turned west to escape. There was no way his sixteen modern battleships and six pre-dreadnaught battleships could confront Jellicoe’s twenty-eight dreadnaughts. (HMS Dreadnaught, entering service in 1906 with the first uniform battery of large guns and the first steam turbine on a capital ship, created a whole new class of warship.) Jellicoe responded by turning south fifteen minutes later, seeking to prevent the High Seas Fleet from reaching port.

HMS Iron Duke – Jellicoe’s flagship
HMS Dreadnaught
SMS Friedrich der Grosse – Scheer’s flagship
There were now some 250 warships engaged in battle; in terms of the tonnage of the ships actually engaged this was the largest naval battle in history. One has to imagine that while the capital ships were maneuvering and shooting at each other over immense distances, there were also 37 light cruisers, 78 destroyers (all British) and 61 torpedo boats (all German) dodging about the behemoths. Fast, nimble and difficult to hit, their job was to counter one another and more important, torpedo the big boys, which made them good cover for their larger colleagues.
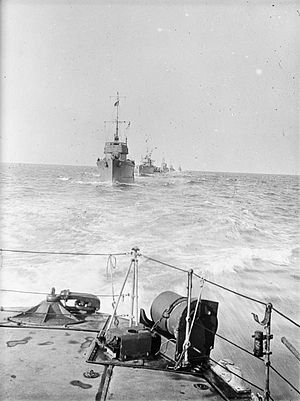
British desroyers

German destroyers (torpedo boats)
Surprisingly, at 6:55 Scheer turned back east. It has been suggested that he mistakenly thought Jellicoe had divided his force, but his memoirs make it clear that he felt there was too much daylight left to simply flee. Without the cover of darkness his slower capital ships would suffer greatly in a stern chase, and he thought to confuse and disrupt the British with his surprise move. This maneuver allowed Jellicoe to “cross the T” (passing in line an approaching column, allowing firing to be concentrated on the lead ships) of the High Seas Fleet again, this time with more concentrated fire.
After twenty-two minutes Scheer turned west again, covering his retreat with smoke and a screen of torpedo boats, normal procedure. But he also sent Hipper’s four remaining battlecruisers on a seeming suicide mission against the British battleships, surely a measure of desperate concern for his own dreadnaughts. Though heavily pounded, the battlecruisers in fact survived, and together with the barrage of torpedo attacks delayed Jellicoe long enough to let Scheer get away.
The last engagement between the big ships occurred just after sunset, from about 8:20 to 8:30, when Beatty’s battlecruisers caught up with Hipper’s. No ships were sunk, and with darkness falling Jellicoe, aware that the Germans were better at night actions, headed south to confront them before they reached the haven of the mine fields. Scheer closed up his fleet and headed southeast, blasting his way through the destroyer screen protecting Jellicoe’s rear, but Jellico steamed on, thinking the action to the north involved torpedo boats.
During the remainder of the night there were several close-range engagements as the lighter warships blundered into each other and the capital ships, but the battle was over. On the way south the pre-dreadnaught SMS Pommern was torpedoed and blew up, and the damaged battlecruiser SMS Lützow had to be sunk. But the High Seas Fleet made it home.
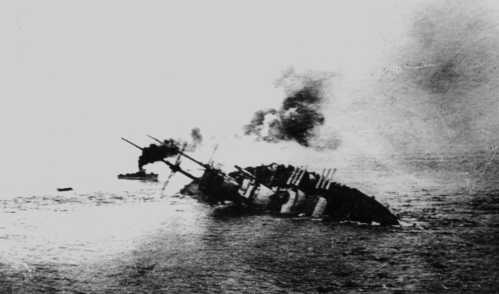
Unidentified battlecruiser going down – SMS Lützow?

SMS Pommern
SMS Lützow
Both sides trumpeted victory. Tactically, the Germans had won the battle, taking on a superior force and inflicting more damage. The British lost three battlecruisers, three armored cruisers and eight destroyers, totaling 113,300 tons; the Germans lost one battlecruiser, one pre-dreadnaught, four light cruisers and five torpedo boats, for 62,300 tons. The Grand Fleet suffered 6945 casualties (6094 killed), while the High Seas Fleet sustained 2758 (2551 killed).
One of the British casualties was Boy Seaman First Class John “Jack” Cornwell, serving on the light cruiser HMS Chester as a Gun Layer for a 5.5 inch gun. Shellfire killed everyone else in the partially closed turret, and though severely wounded and surrounded by fire, Jack stood by his gun, awaiting orders until the action broke off. He died a few days later and was ultimately awarded Britain’s highest decoration, the Victoria Cross. Jack was sixteen, the third youngest recipient of the prestigious award, and almost literally became the boy in Felicia Hemons’ poem written ninety years earlier:

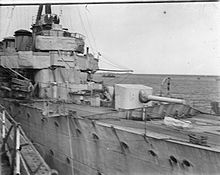
Jack’s 5.5″ gun

John Travers Cornwell
1900-1916
HMS Chester – Jack’s gun
The boy stood on the burning deck
Whence all but he had fled;
The flame that lit the battle’s wreck
Shone round him o’er the dead.
But the strategic victory was British. Jellicoe was widely criticized for excessive caution, but his job was to contain the German fleet not annihilate it, and contain it he did: for the rest of the war the capital ships of the High Seas Fleet did not leave Helgoland Bight. But it was certainly a learning experience for the Royal Navy, which had been definitely outclassed in gunnery and had experienced serious problems with magazine security and ship to ship communications. Fortunately for the Admiralty, Great Britain would not have to fight another significant surface engagement for more than twenty years.
In the end the High Seas Fleet sailed again, this time to Scapa Flow as prizes of the victorious Allies. In 1918 Scheer, now Grand Admiral, planned to send the Fleet out on 29 October to destroy as many British ships as possible to improve Germany’s bargaining position, but with the war clearly lost his sailors began to mutiny. After the Armistice the Fleet was interned at Scapa Flow, sailing under Rear Admiral Ludwig von Reuter because Hipper refused to be involved. On 21 June 1919, having learned the terms of the Versailles Treaty, Reuter ordered the ships to be scuttled, and most went to the bottom, to the delight of Scheer, who felt honor had been satisfied.

“Uh…why don’t you take over now, Franz?”

The High Seas Fleet at Scapa Flow

End of the line
Secretly the British were also delighted, preferring to see the warships destroyed rather than turned over the French and Italians.
