(OK, it took me a long time to get around to this. In any case, this is the first of a series of pieces following the course of the Great War as it happened a century ago – assuming I live another four years. I should have begun this last July, but the idea only now occurred to me, and consequently this first two articles carry the war up through May 1915. Note: “Casualties” includes dead, wounded, missing and captured, and “dead” typically includes accidental and disease related deaths. Military deaths through disease may have been a third of the total, but that is partly due to the influenza pandemic of 1918-1920, and in earlier European warfare disease inevitably accounted for the vast majority of deaths. The ratio of dead to wounded would have varied dramatically from one theater to another but it appears 1-2 to 1-3 was the average for the war. The official figures are not always accurate, and accounting varied; e.g., British figures did not include colonial troops.)
One hundred years and 296 days ago the Great War began when on 1 August Germany declared war on Russia because the Czar, who had pledged to defend Serbia against the Austro-Hungarian Empire, refused to cease mobilizing his army. On 2 August the Germans invaded Luxemburg and the next day declared war on France, which had refused to declare neutrality and was also mobilizing. On 4 August the Germans also declared war on Belgium, which had denied them passage through its territory, and in response Great Britain joined the Entente and entered the war against the Central Powers. Train schedules, lust for glory and willful stupidity had brought the European great powers to the brink of the abyss, into which they all leaped with no little enthusiasm.

Russian Czar Nicholas II

Austrian Emperor Franz Joseph

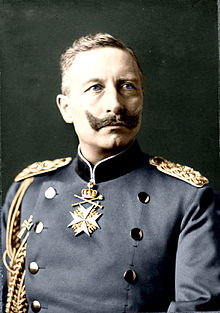
German Kaiser Wilhelm II
The greatest cataclysm in European history since the barbarian invasions of the fifth century had begun, all because a Serbian nationalist, Gavrilo Princip, took it upon himself to shoot the heir to the Austrian throne and provide the Austrians with an excuse to make impossible demands of Serbia. Certainly the fate of Serbia was of some importance to the Austro-Hungarian and Russian Empires, but the partition of the Balkans was a peripheral concern for Britain, France and Germany. Yet all these powers, little understanding how industry and technology had changed the nature of warfare, jumped eagerly into a conflict that would slaughter millions upon millions of young men, destroy three dynasties and exhaust the economies of even the victors. To what end? A peace that would lead in two decades to an even greater catastrophe.
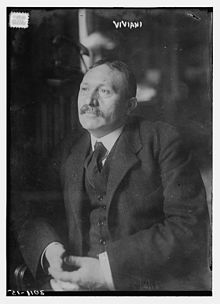
French PM Rene Viviani

British PM Herbert Asquith

Serbian Assassin Gavrilo Princip
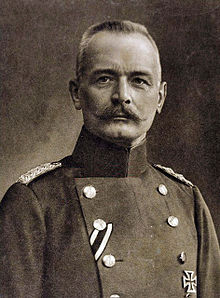
“Paris/Berlin by Christmas” was the cry, as both sides expected a short war. The German plan was to seek a decisive victory in the west while much smaller forces in the east were on the defensive before the notoriously cumbersome Russian army and the Austrians were crushing tiny Serbia. Helmuth von Moltke, the Chief of the German General Staff, intended to employ a variation of the so-called Schlieffen Plan, which in fact was a thought exercise for a single-front war with France. Weak German forces in the south would remain on the defensive and even retreat, while the immensely powerful right wing in the north would sweep through Belgium and the Netherlands and then turn southwards west of Paris, trapping the French armies. Whether the Schlieffen Plan could have worked is certainly debatable (the problem was not so much German transport capabilities as the state of Europe’s roads), but inasmuch as this was a two-front war and sufficient forces had to be sent east, the western army was simply not strong enough to carry out the aggressive strategy.

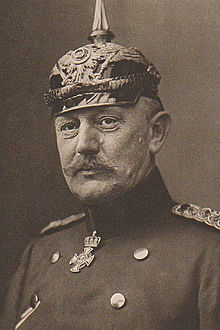
Helmuth von Moltke
The Germans swept through Belgium and northeastern France, generally overwhelming the opposing forces, but in September the exhausted troops were stopped some 40 miles from Paris at the First Battle of the Marne. Repulsed by the French under Joseph “Papa” Joffre and the British (BEF) under Sir John French, the Germans withdrew north of the Aisne River, and both sides then stretched their lines northwards, establishing a fortified line that ran 460 miles from the North Sea to the Swiss frontier. The essentially static Western Front was now in place.

Sir John French
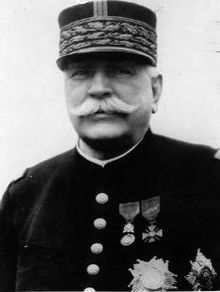
Joseph Joffre

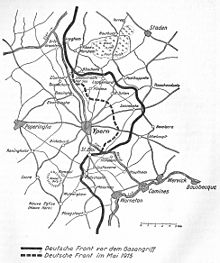
Western Front 1915
Meanwhile, the offensive-minded French, whose basic war aim was to avenge their defeat in 1871 and recover Alsace-Lorraine, promptly invaded those provinces, but the advance was soon thrown back with immense casualties, as generals learned – not very well, it seems – what happened when masses of infantry assaulted fortified positions. In just two months the French had suffered 360,000 casualties, the Germans 241,000; by way of comparison the Roman Empire at its greatest extent (early second century) was secured by perhaps 250,000 troops.
1914 ended with complete stalemate in the west. Unwilling to change their tactics, both the Allies and the Germans would continue to throw men into the meat grinder of fruitless assaults, looking for the elusive breakthrough that would end the war. But at Christmas a startling event had taken place. During the unofficial truce soldiers on both sides began entering no-man’s land and fraternizing with one another, singing carols, swapping souvenirs and drink and playing football. There could be no greater evidence that the men actually fighting the war bore one another no particular grudge, at least at this early stage of the war. This was of course anathema to the generals and politicians of both sides, who quickly put an end to such unpatriotic behavior.

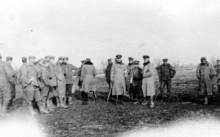
Christmas Truce
Joffre’s strategic plan for 1915 was to pinch off the Noyon (near Compiègne) salient, a huge westward bulge marking the limit of the German advance, by attacking its flanks. As part of this on 10 March the British, who occupied the far northern section of the trench line, launched an attack on Neuve Chapelle. They achieved a tactical breakthrough, but the Germans counterattacked the next day, and though fighting continued, the offensive was abandoned on 15 March with no significant changes in the line. General French blamed the failure on insufficient supplies of shells, which led to the Shell Crisis of May and the creation of a Ministry of Munitions that could feed the growing mania of all the belligerents for artillery barrages. Although this was a very minor operation, the British (including Indians) and Germans lost over 20,000 killed, wounded, missing and captured.
On 22 April the Germans took their shot, initiating a series of battles that would be known as the Second Battle of Ypres (or “Wipers,” as the British troops called it). The First Battle of Ypres had taken place from 19 October to 22 November of the previous year and while indecisive had resulted in more than 300,000 combined casualties, leading Erich von Falkenhayn, who had succeeded Moltke as Chief of Staff, to conclude the war could not be won. Unfortunately, when on 18 November he proposed seeking a negotiated settlement, he was opposed by Field Marshal Paul von Hindenburg and his Chief of Staff Erich Ludendorff and Chancellor Theobald von Bethmann-Hollweg, condemning millions to die in the next five years.
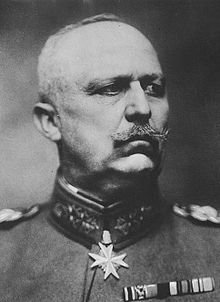
Erich Ludendorff
Erich von Falkenhayn

Paul von Hindenburg
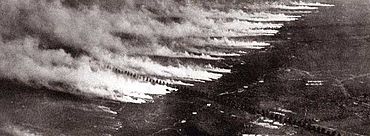
This time around the Germans began their offensive – after the inevitable artillery barrage – with poison gas (chlorine), the first use of this new technology on the Western Front. The surprise and shock opened a gap in the British line, which the Germans, themselves surprised, were unable to exploit, and soon the development of gas masks rendered the new weapon far less effective. The main struggle for the Ypres salient would go on until 25 May, by which time the Germans had pushed less than three miles westward. It cost them 35,000 casualties, but the Allies suffered twice as much. And Ypres was destroyed.

Ypres

Second Battle of Ypres
Meanwhile, on 9 May some 30 miles to the south in the Arras sector the French 10th Army launched an offensive against the Vimy salient, attacking Vimy ridge, while the BEF attacked a dozen miles to the north at Aubers. This was the Second Battle of Artois and would last until 18 June. Joffre’s strategic goal was to cut a number of vital German rail lines, which would require an advance of ten or more miles beyond Vimy Ridge, something that might have struck a competent general as highly unlikely, given the experience of the last nine months. And sure enough, the initial attack took Vimy Ridge, but lost it to a German counterattack, and a month later when the battle ended, the French line had moved less than two miles eastward. The initial British assault was a disaster, allowing the Germans to send troops south, and in the end the Tommies had gained almost two miles. The cost? Officially, 32,000 British casualties, 73,000 German and 102,500 French. During the offensive the French alone had fired 2,155,862 artillery shells.
See a trend in these battles? If the generals did, their response was simply more of the same, producing even more casualties as defensive measures became more elaborate. A continuous line from the sea to Switzerland, the western front offered no possibility of outflanking the enemy, and the weaponry of the time – machine guns, rapid fire artillery, mortars – made frontal infantry assaults very costly, if not suicidal. Inasmuch as the breakthrough weaponry – tanks, motorized infantry and artillery and ground support aircraft – did not yet exist, remaining on the defense and negotiating or at least awaiting developments on other fronts seemed the reasonable course of action. But with Germany holding almost all of Belgium and a huge and economically important chunk of France the Allies were not about to bargain from a position of weakness, and the reasonable expectation that the Central Powers would sooner or later crush the Russians and ship more troops west goaded the Entente, especially the French, into offensives.
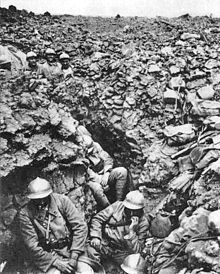
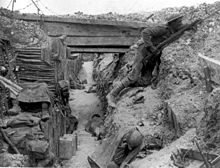
Already in the spring of 1915 defensive systems and tactics were rapidly improving. A more elastic defense was being adopted: rather than a single heavily fortified line, there would be a series of trench lines (three was a standard number), separated by strong points and barbwire entanglements. This meant the attacker had to cross multiple killing grounds just to get to grips with the enemy, often out of the range of their own guns. The clever response to this by the “chateau generals” was longer periods of artillery bombardment and sending larger numbers of men over the top, approaches that were both ineffective and extremely costly. The storm of shells, besides alerting the enemy to an attack, hardly damaged the wire, and defenders simply took cover in their dugouts, ready to pop out and kill when the shelling stopped. A rolling barrage with the troops following was more effective but very difficult to manage without blowing up your own men. And gas was extremely hard to control and use effectively, which is why it has been so rarely used, even by the seriously nasty creeps who have appeared in the last hundred years.
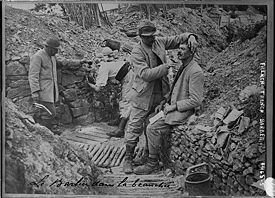
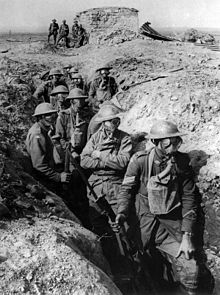
French trench

French trench

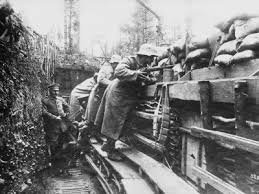
British trench

German trench

British-German Trench Lines

Gas attack

Gassed British trench

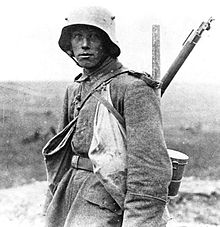
Australians in gas masks
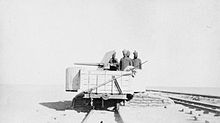
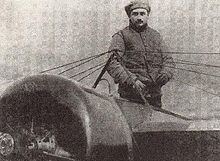
One final noteworthy event in the west during this period. On 1 April French aviator Roland Garros shot down a German plane. Both sides had been using aircraft for reconnaissance, and in September 1914 a Russian pilot had taken out an Austrian plane by ramming it. Soon pilots and observers were using pistols and rifles, but it was clear that only a machine gun could be at all effective in bringing down another plane. The problem was the propeller. “Pusher” aircraft (the propeller mounted in the rear) were too slow, and placing the gun on the upper wing of a biplane made it very difficult to deal with the frequent jams, as well as producing too much vibration for accurate fire. Garros’ approach was to attach metal plates to the prop in order to deflect rounds that actually hit it, and he shot down three aircraft before the strain placed on the engine by the prop being pummeled by bullets brought his own plane down behind German lines. This crude solution would not work with steel-jacketed German ammunition, and the engineers at Anthony Fokker’s aircraft plant produced a synchronization device that allowed a Maxim machine gun to be mounted directly in front of the pilot and shoot through the prop. On 1 July Kurt Wintgens, flying a Fokker E.I., became the first pilot to score a kill with a synchronized gun. Suddenly the Germans had the first air superiority in history.

Wintgens’ Fokker E.I.

Roland Garros
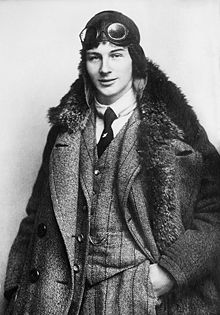
Anthony Fokker